Foam treatment helps laminitic horse with poor frog
(The first clip is from October 28, and the last two are from December 26.)
Editor’s note added on Jan. 7, 2023: Read this post on using a mastitis drug for frog infections before you start experimenting with foam. The mastitis drug might be a lot more effective. It certainly worked for Kurt.
Editor’s note added on Feb. 28. 2021: This approach might help one in 50 laminitic horses, based on my experience since I wrote this, so I wouldn’t expect miracles. Perhaps the real lesson is that a small change in the loading of a laminitic foot can make a big difference, and it can be worth the time to experiment with different materials in different places on the bottom of a sore laminitic foot to see if you can provide some relief. But bear in mind that numbness can factor into laminitis, and a horse not loading a foot may be the result of numbness or partial numbness.
Heading into Thanksgiving 2014, my laminitic horse Robin Hood was getting more and more uncomfortable.
Trying to keep him alive seemed a little selfish, considering his condition.
In the previous months, I had been studying veterinarian Debra Taylor’s 2014 presentation on hooves, particularly the importance of the digital cushion and frog in supporting the back half of the foot, and I was concerned that Robin seemed pretty deficient in both. His shallow frog was bearing no weight as he walked, and its wavy shape made me think his digital cushion was compromised. My longtime solution of keeping Robin in boots with thick cushions was no longer enough to provide relief.
I decided to experiment with his boot inserts over the holiday weekend, and if I couldn’t make him better, we’d give up.
There’s been no shortage of experimentation with foam at this farm. My basement looks like a foam warehouse, and I thought I had tried it all in every configuration.
One thing working in our favor that weekend was Robin couldn’t put weight on his left front at all. Each time, I changed out his foam, he tried to put his foot down. If my treatment didn’t help, he immediately picked up the foot again. As feedback goes, that’s priceless.
Two hours into this process, I stumbled over a two-fold answer that provided a smidgeon of relief. And over the days and weeks that followed, Robin continually improved.
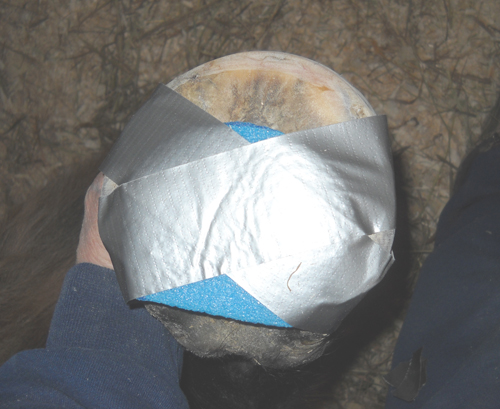
The foam is taped in place and does not extend beyond the tip of the frog. Two pieces of tape are showing in this image, but I also add one from the foam over the toe to prevent the foam from moving forward or backward.
The first part of the answer was foam placement. In previous experiments, I had tried to raise the whole back of the foot, as a lily pad would do, by adding extra foam in the back of the boot. What I envisioned as added support translated to added pressure on Robin’s heels. That made him worse. This time, I left Robin’s heels outside the foam.
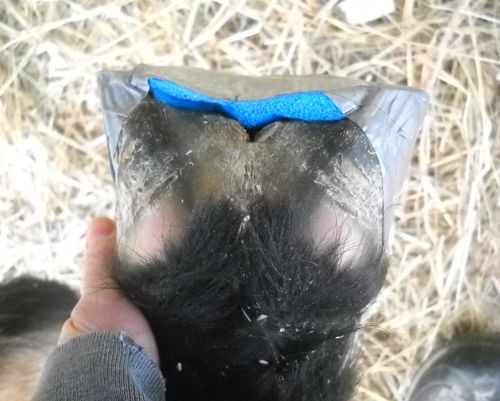
The foam is placed inside Robin’s heels, covering the collateral grooves and sole along with the frog. It starts out 1/2 inch thick but squishes down immediately.

The foam fills in Robin’s collateral grooves along his frog.
The second part of the answer was the foam type. I experimented with a camping mat foam (Ozark Trails brand) sold at Walmart. To my surprise, Robin seemed to benefit from it filling in his collateral grooves next to the frog as it got squished down. This collateral groove support somehow relieved his pain.
To keep the foam in place, I’m taping it to Robin’s foot as opposed to placing it inside the boot, since the boot can move around. I change out the foam every day in each foot. He also still needs inserts in the base of the boot.
Also in the past, Robin did not like me adding a frog-shaped piece of foam over the frog. Again, what appeared to work this time was the foam dispersing in the collateral grooves.
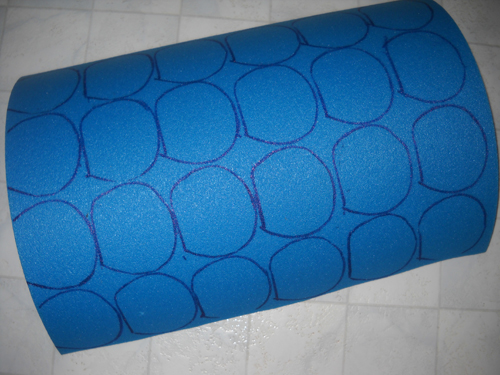
The shape of the foam insert has changed over time. I try not to cut out too many in advance in case I need to adjust.
We’ve tried to refine the foam pieces since Thanksgiving. Doubling the foam was a big no-no; Robin got less sound from that before we reverted to one layer. Robin is more comfortable if the piece does not go beyond the tip of the frog.
He’s more comfortable in general with longer heels, but now I’m seeing if lowering those long heels has any effect with the foam filling in the collateral grooves and perhaps lifting up his coffin bone.
He may need to wear the foam the rest of his life. I’m fine with that.
If your horse is deficient in frog or digital cushion and you can’t get the horse comfortable through trimming or other methods, you might try this. The cost is next to nothing.
Watch the video at the top of this page to see Robin’s movement before and after I added the foam.
No one was more surprised than I that this worked. Well, maybe Robin. He’s a trooper.


